I got the great opportunity to play with the new PMC Sterling in November and I will love to share with all of you my experience and what I think about this new type of clay.
The clay looks very similar to the PMC Pro, the color is
darker than the original PMC.
When I took the clay out I noticed the texture is great and very easy to work with, I decided to make a ring first and I made a snake with some of the clay to form the band for the ring. I used a plexiglass to make a long snake and I rolled it around a mandrel.
I went 3.5 sizes bigger to get the size I was looking for, a size 9.
I do not used any inserts in my ring when I fired it.
The PMC Sterling has a longer working time than the PMC3 (this is the type of clay I usually use in all my silver work.) In case the clay gets dry, you can add a little water and it
gets soft very fast, almost immediately.
Carving is also great in this type of clay, it goes very
easy. This is something I was very eager to try since most of my work has
carving into the designs.
It carves very smoothly and with no problems at all.
TIP: Always save the carving scraps, these can make a great texture in your work, you will see it in my finished pieces at the end of this post.
Hand sculpting and forming is fantastic because the clay
does not dry fast. This gives you the perfect time to hand form flowers or
other things. I hand sculpt a lot in my work and I was very happy to see how easy it is to do it with PMC Sterling.
I also made earrings and a pendant. For the earrings I decided to add some fire in place CZs and I embedded two sterling jump rings into each earring.
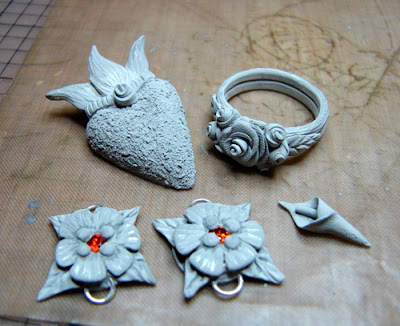 |
| I used my carving scraps to add texture in my heart pendant. |
Because my pieces were more than 3mm thick I decided to fire
them to a longer time that the suggested time in the package.
I first fired them in the open shelf, like we do with any
other type of PMC (except PMC Pro), fast ramp to 1000F and hold there for 40
minutes. I waited until the pieces were cool inside the kiln; I also waited
until the pieces were cool because I had fired two CZ Hessonite Garnets and we
always have to be careful not to take the pieces very fast because the change
of temperature may crack the stones.
The second firing was done with a steel pot and activated
carbon. I added half an inch at the bottom and added my pieces in one layer,
covered them with another half an inch and added the top of the pot.
I fired them inside the pot fast ramp to 1500F and hold for
45 minutes.
I left the pieces cool down inside the pot in the kiln
before I took them out.
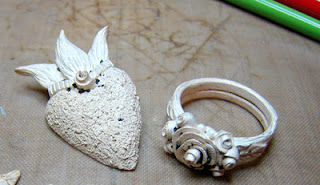 |
| This is how the sterling looks like when you take them out of the kiln |
I brushed them with soapy water and a brass brush. After this I added LOS Gel patina and brushed some of the patina off before I added the pieces inside a tumbler.
I usually use a rotatory tumbler but this time I decided to give it a try to a magnetic tumbler. I was AMAZED at how fast this wonderful polishing machine can give your pieces a beautiful shine. I will have to start saving money to get myself a bigger size, since some of my pieces are bigger and do not fit in this size tumbler I have now. It is worth it !!!
These are all the pieces I made with 25 grams of PMC Sterling. They are not very thin, so if you make pieces that are thinner and small in size you will be able to make more out of the 25 grams of PMC Sterling.
The cost is very similar to the PMC3 and I feel it is great to have it like that. Now you will be able to create pieces that can be mark as .925 (sterling) and they will be stronger than fine silver.
I do want to mention I will be firing for almost two hours on the second step firing of the PMC Sterling. I want to be 100% sure they are totally fired to their best strength. I am saying this because I tested the little Calla Lily and I felt the piece was not fully sintered when I tried to curl up the point of the flower after fired. I will let you know of my future firings.
The pieces are beautiful and easy to polish and I am sure you will enjoy working with it.
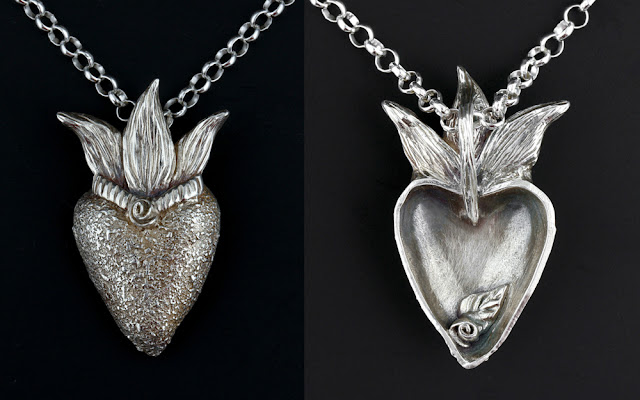 |
EL CORAZON
©2011 Lorena Angulo
PMC Sterling
photo: Speedy Peacock |
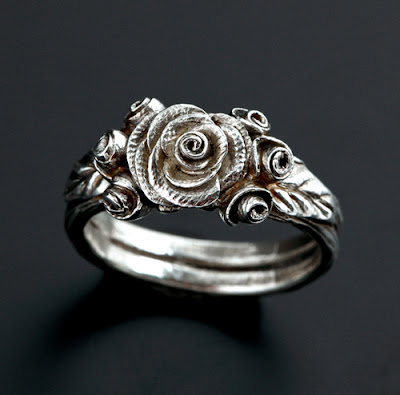 |
ROSAS
©2011 Lorena Angulo
PMC Sterling
photo: Speedy Peacock |
 |
FLOR
©2011 Lorena Angulo
PMC Sterling, pearls, CZ Hessonite Garnets, embedded jump rings
photo: Speedy Peacock |
Pin It


